Learn to Make NES Games
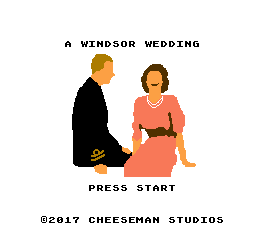
A Lifetime of HappiNES: Title Screen
It’s been a while since the last post, but this is going to be a special one.
A friend of mine recently got hitched to a pretty rad lady, and I didn’t want him unprepared for the quest ahead. He just happens to be a retro gaming console collector and enthusiast (not to mention one of the top-ranked Duck Hunt players in the world), so I figured I’d try making them a custom NES game, cartridge and all. This series of posts is going to cover that process all the way through, including all of the manual and messy bits.
Partly to maintain anonymity, but mostly to keep their gift a special one-of-a-kind collector’s item, for this post we’ll instead be making a gift to send back in time to Princess Elizabeth’s wedding.
The Idea
Unfortunately this idea didn’t strike me until a few weeks before the wedding, so I had to keep the project scope at a realistically achievable level. I planned for three main parts:
- A title screen inspired by one of their engagement photos
- A simple level where the groom would stash a ring in his inventory and use it to propose
- A credit screen inspired by their wedding invitation where we could wish them the best
I chose the NES-NROM-128 as my target cartridge board for maximum simplicity. 16 KiB of PRG ROM would be more than enough and I’d just have to make do with two 4KiB banks of CHR ROM.
Development
I borrowed a lot of code from my earlier posts to get this project jumpstarted, so I won’t be covering things like common assembly code or linker configuration unless there’s something that I haven’t covered before. I’m going to primarily focus on the game logic and asset creation.
To start, let’s create a skeleton for our main() function that will set everything up to render the title screen then
kick off rendering and jump into the main game loop:
void main(void) {
    InitTitle();

    // turn on rendering
    ResetScroll();
    EnablePPU();

    while (1) {
        WaitFrame();
        HandleInput();
        Update();
        ResetScroll();
    };
};
Title Screen
I was inspired by the bride and groom’s awesome engagement photos and wanted them featured prominently on the title screen. For our game, let’s use this great photograph of a young Philip and Elizabeth as our inspiration:
 Source: Old Magazine Articles
I’m not much of an artist, so I’m going to let the computer do as much work as possible and then try to make things look nice at the end. Let’s open up a Jupyter notebook and put Pillow to work. First, I want to get this down to a reasonable size. Something that will fit within our 256x240 resolution with room to spare for some text.
from PIL import Image, ImageFilter

img = Image.open('./original.jpg').convert('RGB')
img.thumbnail((150, 150)) # resize and maintain aspect ratio
img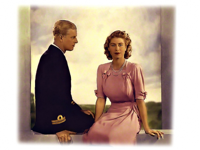
Next, let’s quantize the image to only use colors from the NES PPU palette.
First, we’ll scrape the RGB data using Beautiful Soup and store it in a pandas DataFrame.
import ast
import re

from bs4 import BeautifulSoup
import pandas as pd
import requests

response = requests.get('https://en.wikipedia.org/wiki/List_of_video_game_console_palettes#NES')
soup = BeautifulSoup(response.text, 'lxml')

palette_colors = [
    # extract RGB tuples from CSS in style attribute and eval as python tuples
    ast.literal_eval(re.search('(\(.*\))', el['style']).group(1))
    for el in soup.find(id='NES') \
                  .find_next(text='Hex Value') \
                  .find_previous('table') \
                  .find_all('td', style=re.compile('background:rgb'))]

palette_colors = pd.DataFrame(palette_colors, columns=['R', 'G', 'B'])
palette_colors['Hex'] = palette_colors.index.map(lambda i: f'${i:02x}')
palette_colors.head(5)| R | G | B | Hex | |
|---|---|---|---|---|
| 0 | 124 | 124 | 124 | $00 |
| 1 | 0 | 0 | 252 | $01 |
| 2 | 0 | 0 | 188 | $02 |
| 3 | 68 | 40 | 188 | $03 |
| 4 | 148 | 0 | 132 | $04 |
Next, we’ll use this to create a palette and force the image to use only these colors.
import itertools

# flatten RGB values into tuple i.e. (R1, G1, B1, R2, G2, B2, ...)
pil_palette = tuple(itertools.chain.from_iterable(
    palette_colors[['R', 'G', 'B']].itertuples(index=False)))

# pad tuple to 256 colors
pil_palette += (0, 0, 0) * (256 - len(palette_colors))

# create palette image with NES color palette
palette_img = Image.new('P', (1, 1))
palette_img.putpalette(pil_palette)

# this will dither
# quantized = img.quantize(palette=palette_img)

# use `ImagingCore` directly to avoid dithering
q = img.im.convert('P', 0, palette_img.im)
quantized = img._new(q)

quantized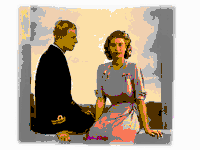
Finally, we’ll use a median filter to smooth out the image into large contiguous chunks of colors. This will make it easier to see the more important features of the image because we’ll have to work within very tight palette restrictions to render this on the NES.
quantized.convert('RGB').filter(ImageFilter.MedianFilter(3))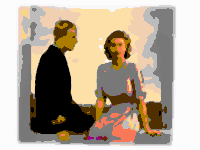
This looks terrible, but it’s a great starting canvas. Now it’s time to open up your pixel editor of choice and draw the rest of the owl. I tried to go for the fewest colors that still preserved the general look of the image and ended up with this:
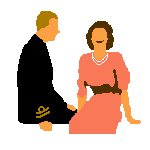
To make the full title screen, we paste that image into a new 256x240 canvas, find a nice 6x6 pixel font to fit inside the 8x8 tiles, and add some text. It’s important that we place the letters along an 8x8 grid so that we only need one tile in CHR memory per letter. I’m also targeting NTSC, so we are accounting for overscan and pretended the top and bottom 8px of the image don’t exist. I also highly recommend Mega Cat Studios’ in-depth guide to NES graphics as a good primer.
This is great, but we can’t exactly just load up a PNG on the NES. Luckily, Dustin Long made an awesome utility called makechr which is a huge help for turning 256x240 images into the data we need to render them. For this example, it’s as simple as running the following command:
makechr -e error.png bg_title.pngIf there are any errors (e.g. pixel color not in the NES palette, too many palettes, more colors in one 16x16 zone than can fit in a palette), there will be error output messages and a file named error.png will contain the source image with a grid overlay and red squares highlighting the problematic areas of the image.
If there are no errors, we should have four output files:
chr.datwith the data for the sprite tiles we’ll put in CHR ROMnametable.datdescribing which tiles go where in the PPU nametableattributes.datdescribing which palettes to use in the PPU nametablepalette.datwith the PPU color palettes
We want to next load these up in the NES Screen Tool to preview that everything looks OK and be able to export the data to C code. To be able to do that, we’ll need to get the data in a format that NESst will understand.
cp chr.dat sprites.chr
cp nametable.dat bg_title.nam
# append attributes to nametable
cat attributes.dat >> bg_title.nam
# get just the first 4 palettes (e.g. get bg palettes, ignore sprite palettes)
head -c 16 palette.dat > bg_title.pal
Now, we can open up NESst.exe (like most of the tools we’ll be using, this was created for Windows but runs just fine in wine on macOS and Linux) and first open up the sprites.chr file and then the bg_title.nam nametable file.
The palette should load automatically as long as it shares the same name except with the .pal extension (i.e. bg_title.pal).
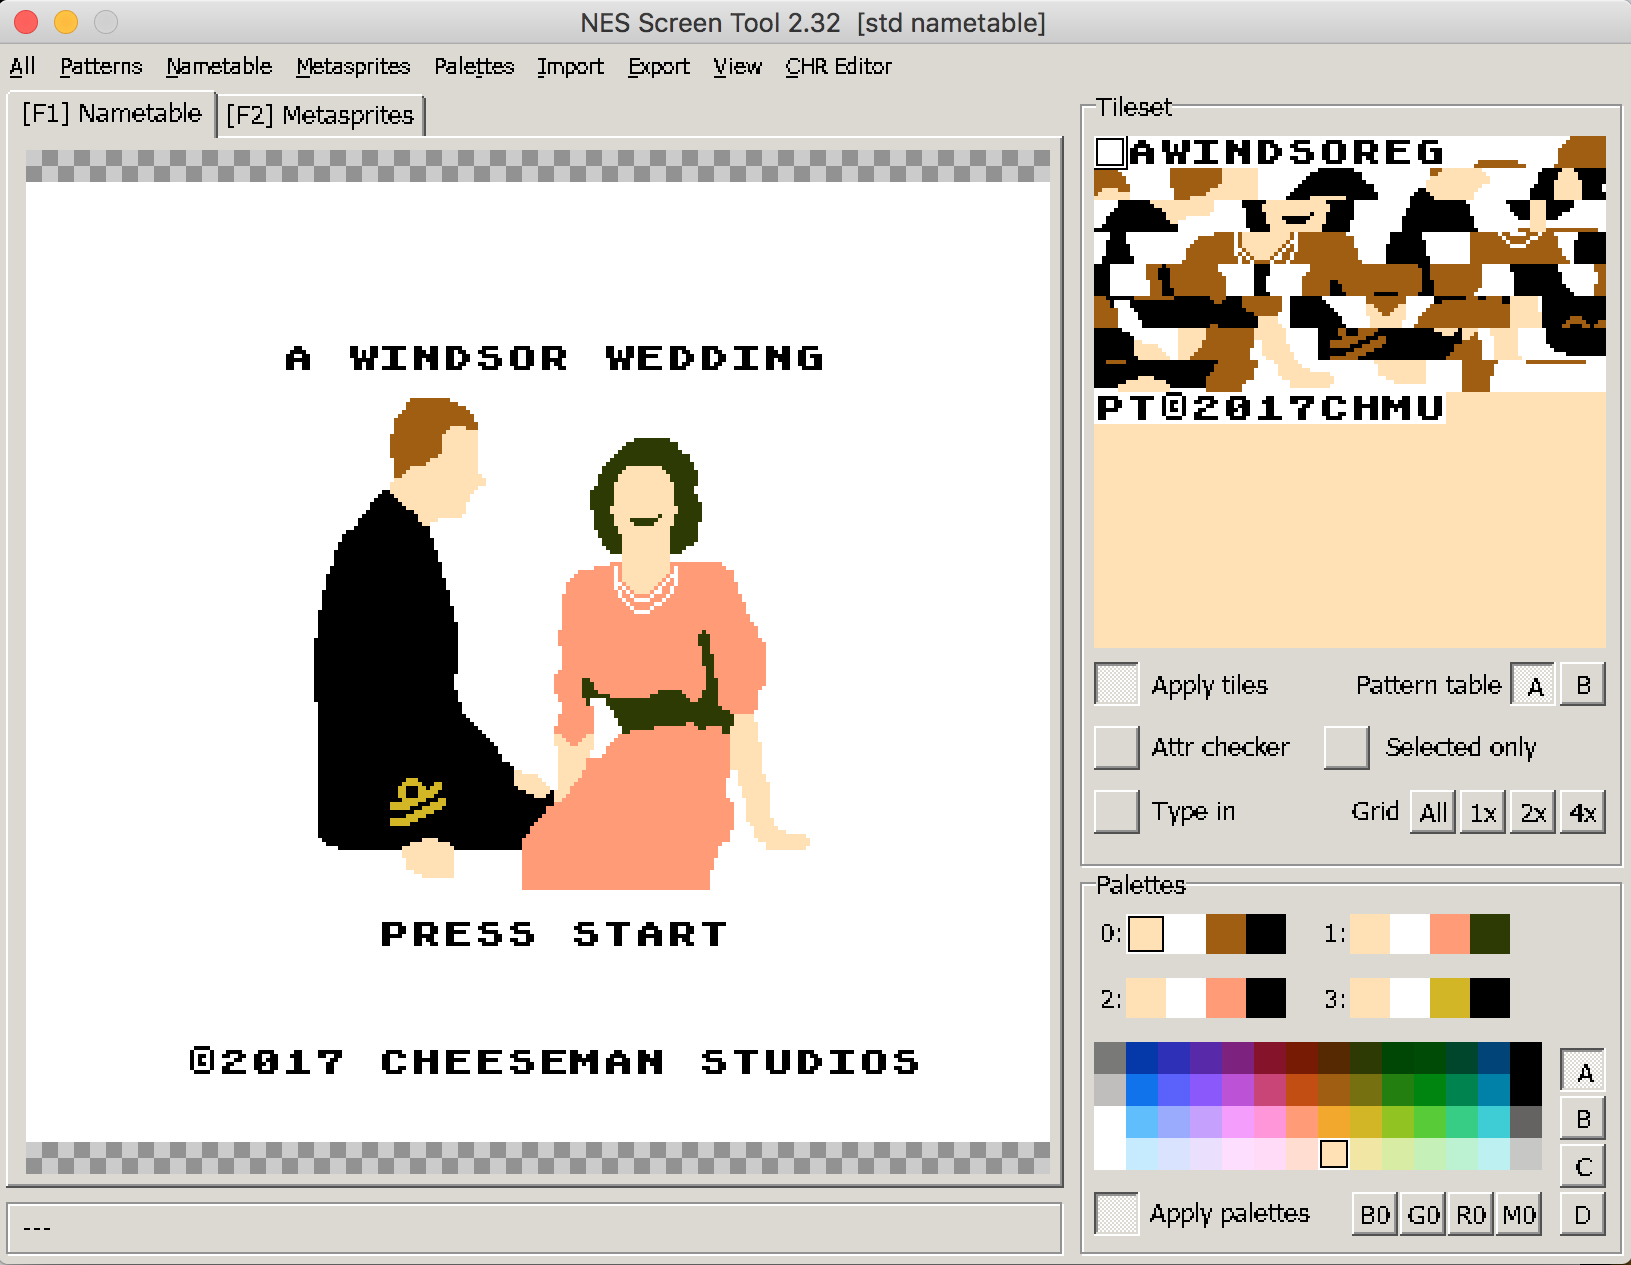
From within NESst, you can tweak the pixels of your CHR tiles using its built-in editor (or use a tool called YY-CHR for more advanced features), modify the palettes, or move tiles around to suit you. We did most of the work for the title screen upfront in creating our PNG earlier, but we’ll be using NESst in more earnest for the level and credits screens.
Once everything looks good, we’ll export the nametable and palette data to C code. First, go to Nametable→Save nametable and attributes and choose “RLE packed as C header” from the dropdown to save to a C header (.h) file. You could just use the “C header” option, but using run-length encoded data saves us some PRG ROM space and we want to add music later. Next, go to Palettes→Put to the clipboard→C data and paste that into the same header file, resulting in something like this:
#ifndef BG_TITLE_H_
#define BG_TITLE_H_

#include <stdint.h>

const uint8_t BG_TITLE[334] = {
0x8b,0x00,0x8b,0xa7,0x01,0x00,0x02,0x03,0x04,0x05,0x06,0x07,0x08,0x00,0x02,0x09,
...
0x55,0x00,0x8b,0x03,0x0c,0x88,0xa5,0x25,0x00,0x8b,0x10,0x00,0x8b,0x00
};

const uint8_t PAL_TITLE[16] = {
0x37,0x30,0x17,0x0f,0x37,0x30,0x26,0x08,0x37,0x30,0x26,0x0f,0x37,0x30,0x28,0x0f
};

#endif // BG_TITLE_H_
Now we can use the UnRLE asm code (which is borrowed from Doug Fraker’s tutorial code, which is itself a CA65 rewrite of Shiru’s NESASM version that is included with NESst) to create a helper function to render RLE-compressed background data to the PPU nametable:
uint8_t const * bg;            // background data

void DrawBackground() {
    PPU_ADDRESS = (uint8_t)(PPU_NAMETABLE_0 >> 8);
    PPU_ADDRESS = (uint8_t)(PPU_NAMETABLE_0);
    UnRLE(bg);
}
Now, our InitTitle method is as simple as loading the background palette and nametable data into the appropriate areas
of PPU memory.
void InitTitle() {
    // write palettes
    ppu_addr = PPU_PALETTE;
    ppu_data = PAL_TITLE;
    ppu_data_size = sizeof(PAL_TITLE);
    WritePPU();

    // draw background
    bg = BG_TITLE;
    DrawBackground();
}
And just like that, we have the beginnings of our game! That’s all for now, but stay tuned for the next post. If you’re impatient, feel free to check out the full source code or load the finished product in your NES emulator of choice.